HOME
MAINT - INSTALL
PRICING
INFO
GALLERY
emergency safety shower and eyewash combination unit
HOME
MAINT - INSTALL
PRICING
INFO
GALLERY
safety shower and eyewash combination units
Installation Instructions
Unpack the safety shower, eyewash and remove the signage
fit the shower valve activation lever
Install into position (height is one meter from ground to eyewash centre)
1" supply line is RECOMMENDED
210kpa water pressure required
conect to potable / drinking water
fit an isolation valve ( recommended )
fit the remaining parts
Turn the water supply on and check for leaks and remedy if needed
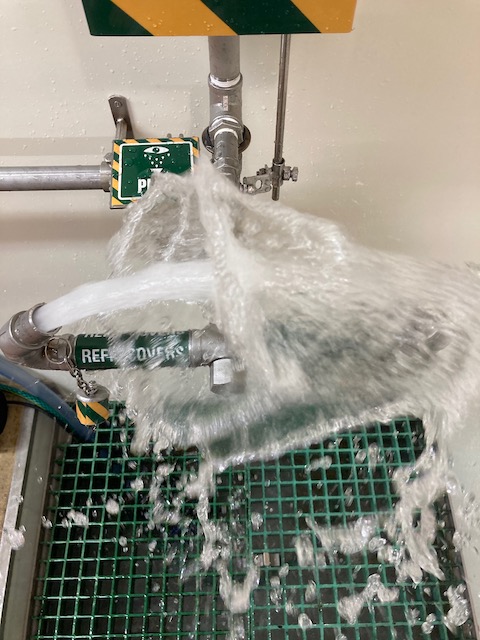
check the eyewash water flow if meeting gentely together no need to adjust
check that the shower and eyewash are working together simultaneously, if good no need to adjust
if ADJUSTMENTS are required folow steps below
Setting Eyewash Water Flow
set the eyewash flow first
with the shower in the off position
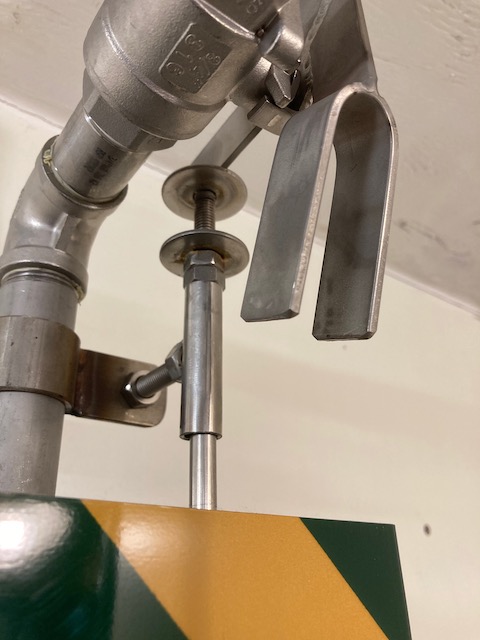
loosen the 8mm bolt that connects the eyewash's flow control valve lever to the linkage
rod
with the water running adjust until you get the desired flow then re-tighten the bolt
next check the shower and eyewash for simultaneous operation by activating them both together
if eyewash streams are meeting softly together with the shower on, then no further action is required
if not adjustments will need to be made at the top end of the linkage rod
Setting Shower/Eyewash Balance
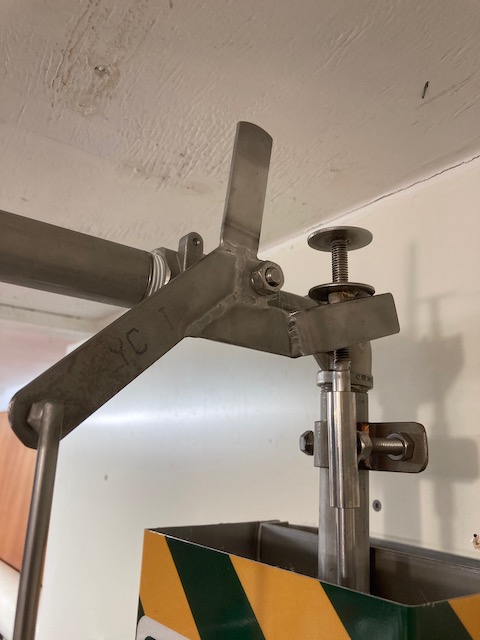
undo the 8mm lock nut at the top end of the linkage rod
screw it up for less flow and down for more flow
after adjustments,
the linkage support bracket will need to be repositioned
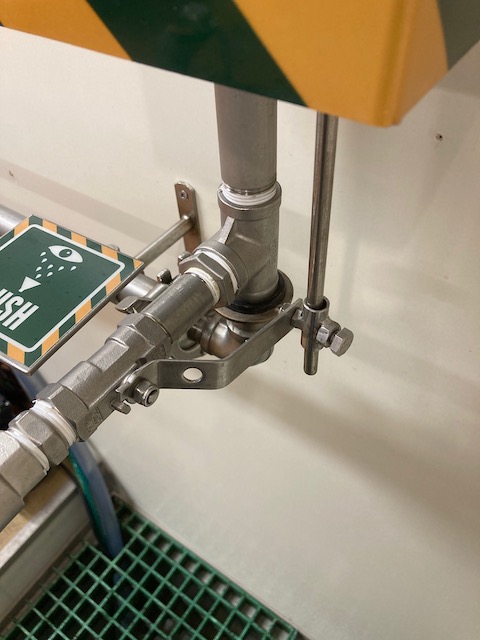
To reset the support rod bracket, loosen the 8mm bolt that clamps it to the ¾" shower pipe
move it up underneath the lock nuts
the washer on the top of linkage rod must be up against the shower lever arm and CENTRALLY aligned
with the water off turn the shower on and off slowly a few times and check alignments etc
turn the water on back on and Check the
shower and eyewash flows
adjust more if needed
reFit the signage
Shower is in the off position with the support bracket up against the lock nuts, CENTRALLY aligning it and holding it up against the top washer
the shower activated with the linkage rod lifted, OPENING up the eyewash flow control valve ALLOWING more water flow bringing the eyewash back up
the eyewash flow control valve is opened up more, when the shower is turned on to re balance the eyewash water STREAMS
high volume low PRESSURE eyewash water flow. with the STREAMS CONNECTING softly together